
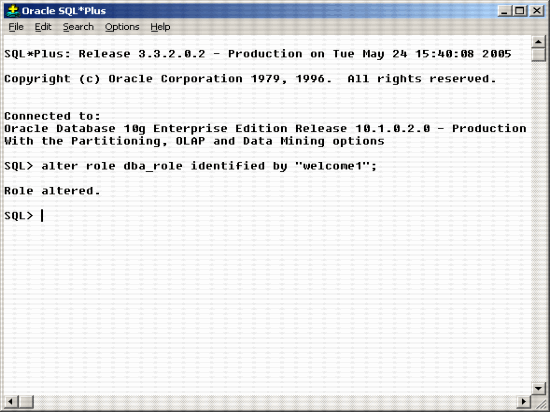
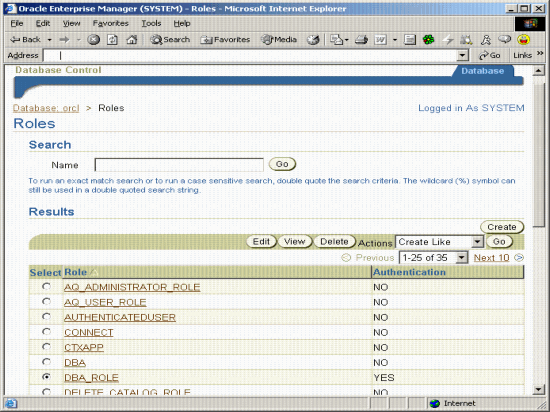
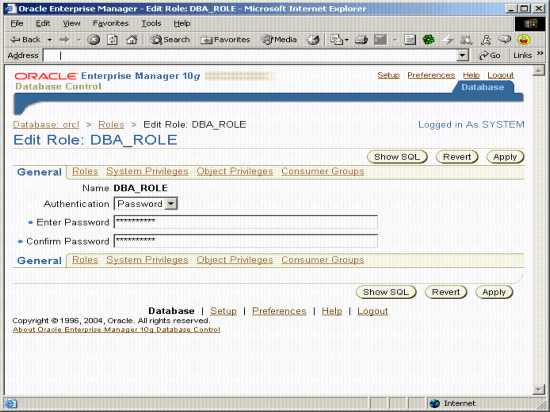
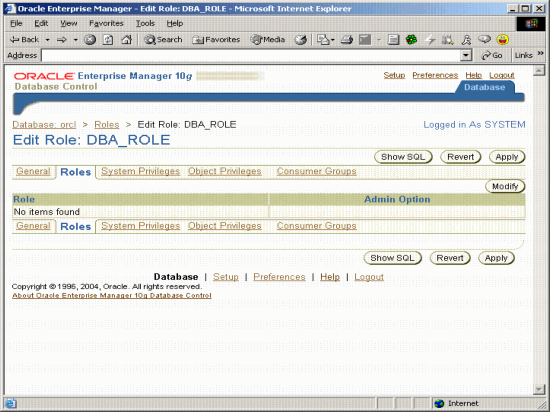
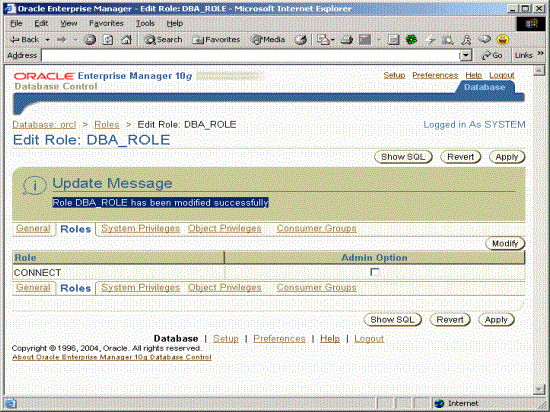
Oracle 10g Free Training - Managing Roles and Privileges : This tutorial provides the ways and steps of managing database roles and privileges using SQL Plus and Enterprise Manager . Similar to creating users, user accounts can be managed either through EM or directly through sqlplus. You can use following command to change the password of the user Figure 9. Change Password Sqlplus Window Following window which is similar to figure 5 can be used to modify the user through EM. Figure 10. Manager Role EM Window Following window as in figure 11 can be used to change password of role. Figure 11. Manage Role General Window Click on Roles Tab in the window to get the following window as in figure 12. Figure 12. Manage Role Roles Window Click on the modify button to modify any roles to DBA_ROLE . Following window would appear as shown in figure 12.1. Figure 12.1 Managing Role Roles Window Select any of the roles you want to assign to DBA_ROLE and Move button. You can also use Move ALL button to grant all the roles to DBA_ROLE role. Figure 12.2 Managing Role Roles Window Click on Apply button to grant the selected roles to DBA_ROLE. If you check the Admin Option Checkbox, then the role would be granted with ADMIN OPTION so users with DBA_ROLE can grant Connect Role to other users. Figure 12.3 Manage Role SQL Window Once you click Apply button on figure 12.2, following screen will appear in front of you. Figure 12.4 Manage Role Granted Window The Highlighted message above shows that Connect role has been granted to DBA_ROLE. Figure 13 Manage Role System Privileges Window Figure 13.1 Manage Role System Privileges Window Select any of the system privileges listed in Available System Privileges area and click on move button to move it to selected system privileges area. You can also move all the system privileges using move all button. Figure 13.2 Manage Role System Privileges Window We have selected Create Any Procedure privilege in figure13.2. Once you click OK Button following screen will appear in front of you. Figure 13.3 Manage Role System Privileges Window Click on Apply button to grant the selected privileges to DBA_ROLE. If you check the Admin Option Checkbox, then the system privilege would be granted with ADMIN OPTION so users with DBA_ROLE can grant Create any procedure system privilege to other users. Figure 13.4 Manage Role System Privileges SQL Window Once you click on Apply button in figure 13.3 following window will appear in front of you. Figure 13.4 Manage Role System Privileges Granted Window The Highlighted message above shows that Create Any Procedure System Privilege has been granted to DBA_ROLE. Similarly you can click on object privileges link in figure 12.4 to grant any object privileges to DBA_ROLE. Figure 14Manage Role Object Privileges Window Please select the object type (Highlighted in Figure14 above) for the object on which you want to grant privilege to DBA_ROLE. Click on Add Button beside the object Type. Following window will appear in front of you. Figure 14.2Manage Role Object Privileges select Window Click on icon beside the select function objects text area to choose the object on which you want to grant the privileges. Figure 14.3Manage Role Object Privileges select Object Window Select the appropriate Schema and search for your function name(test_function in this example). Press GO. Figure 14.4Manage Role Object Privileges Object selected Window If the object exists in the database it will displayed in the window (as in Figure 14.4). Check the checkbox beside the object name and click on select button. Figure 14.5Manage Role Object Privileges Object selected Window Choose the appropriate privilege to be granted and move it from available privilege area to selected privilege area. Figure 14.6Manage Role Object Privileges Object selected Window Figure 14.7Manage Role Object Privileges Window Click on Apply button to grant the selected privileges to DBA_ROLE. If you check the Admin Option Checkbox, then the privilege would be granted with ADMIN OPTION so users with DBA_ROLE can grant this privilege to other users. Figure 14.8Manage Role Object Privileges SQL Window Click Apply to commit the changes. Figure 14.9Manage Role Object Privileges SQL WindowManaging Roles
Managing Roles through sqlplus
Managing Roles through EM
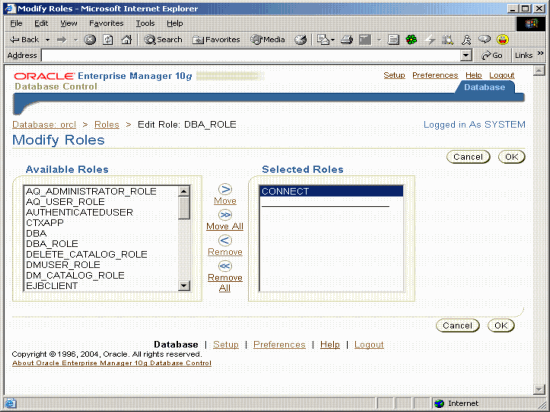
Once you click “OK” button, following window would appear.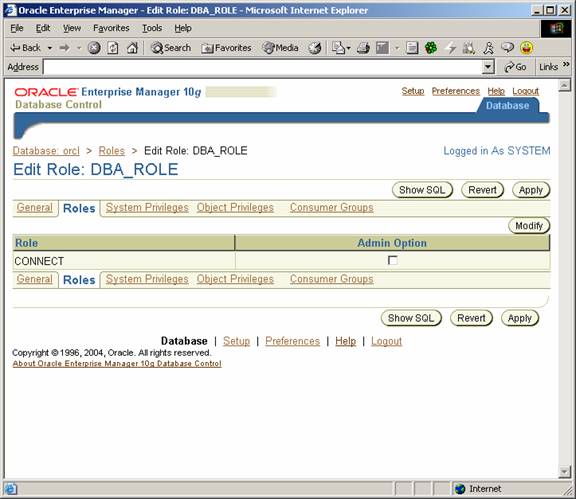
You can also click Show Sql button to actually see the sql query which EM will run to grant these roles. 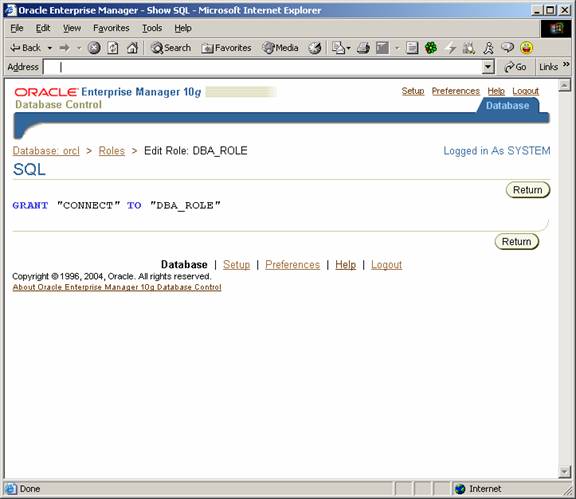
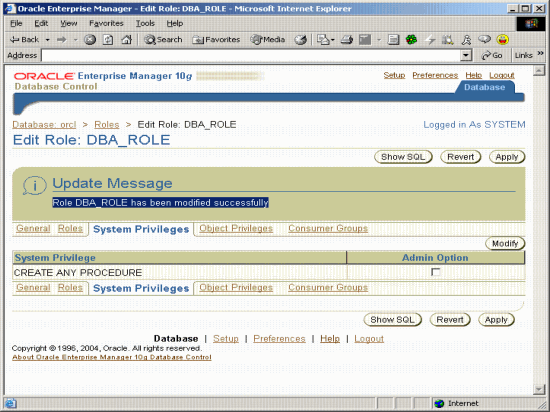
Similarly you can click on system privileges link in figure 12.4 to grant any system privileges to DBA_ROLE.
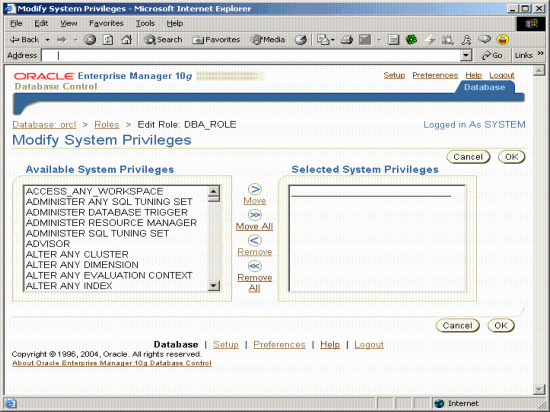
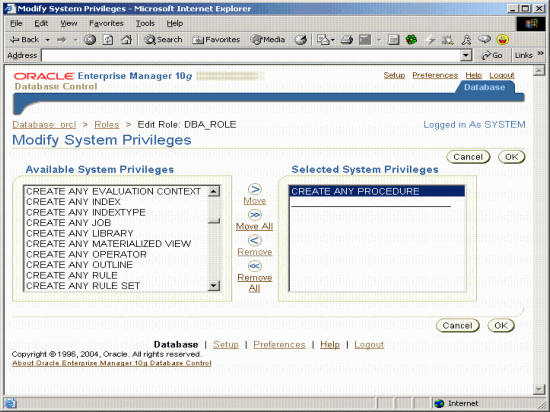
Following window will appear in front of you when you click on system privileges link. 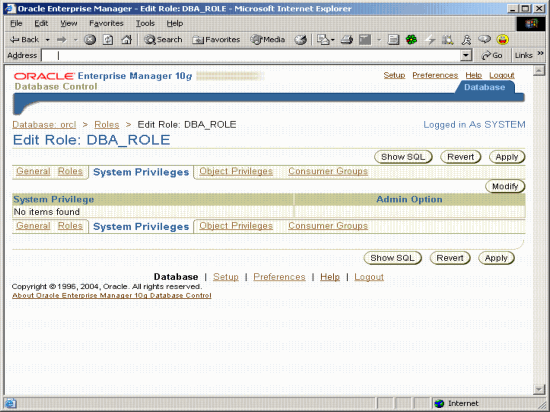
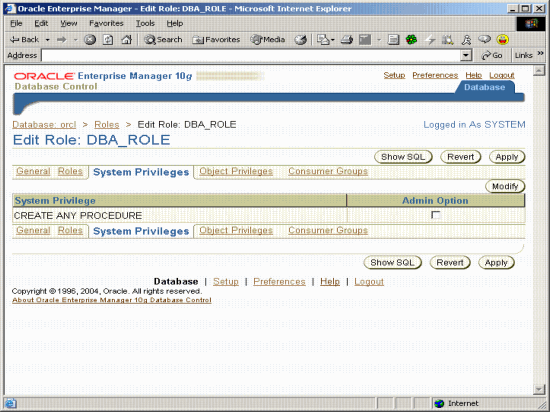
You can also click Show Sql button to actually see the sql query which EM will run to grant these privileges. 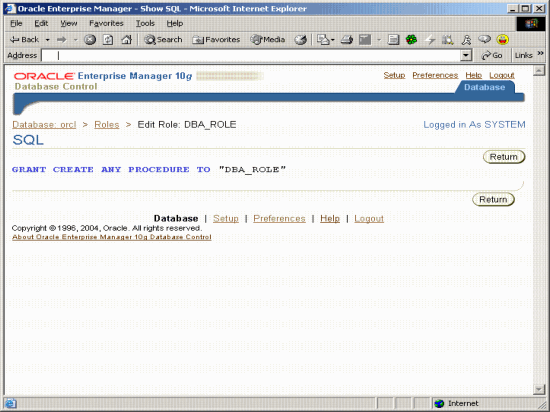
Following window will appear in front of you when you click on object privileges link. 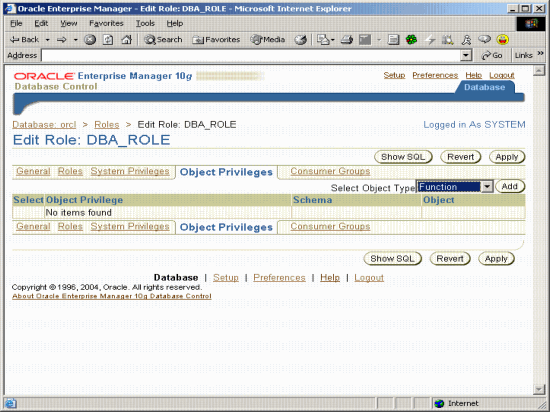

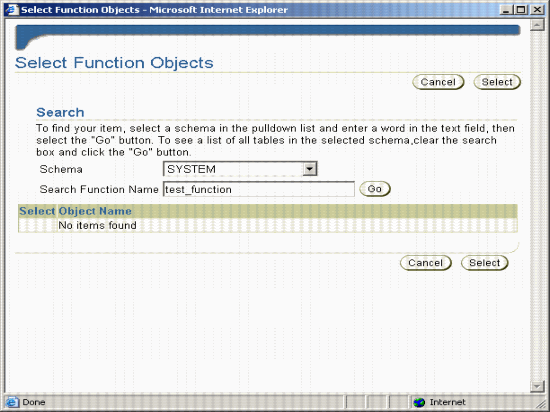
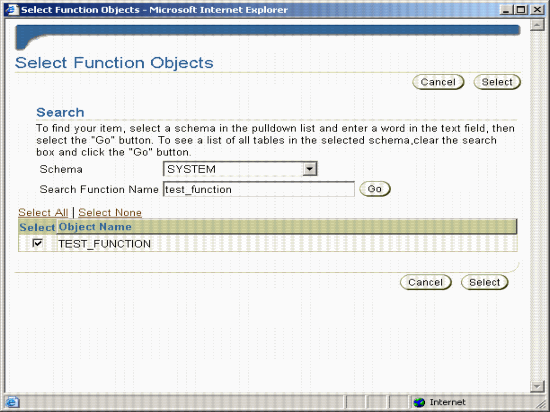
Object name will appear in figure 14.2 and will be displayed as below. You can also directly enter the schema.object_name. 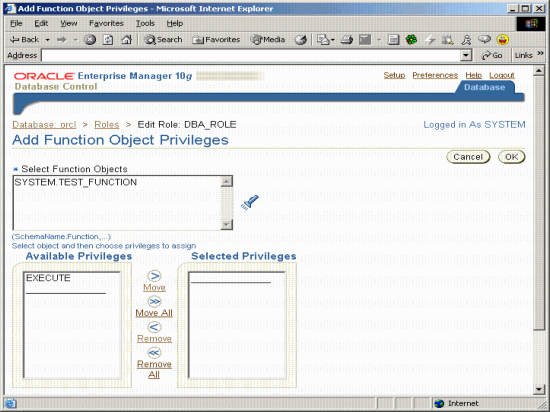
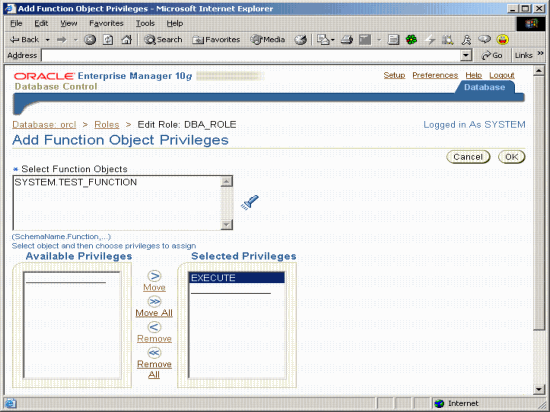
In this example, we are giving execute privilege on test_function to DBA_ROLE. Click on ok button and following window will appear in front of you. 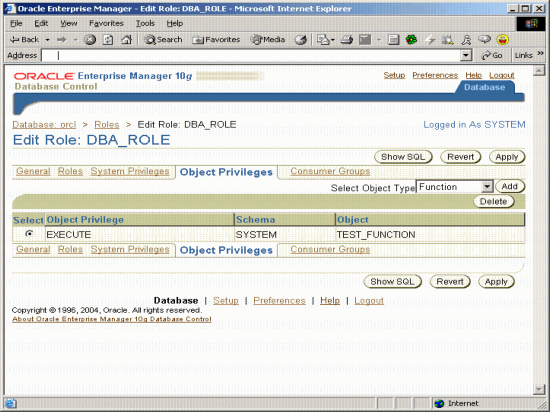
You can also click Show Sql button to actually see the sql query which EM will run to grant these privileges. 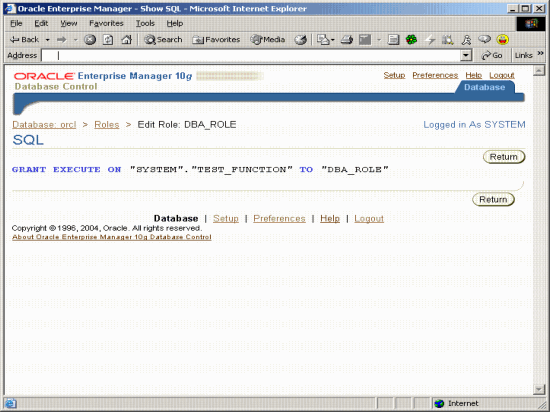
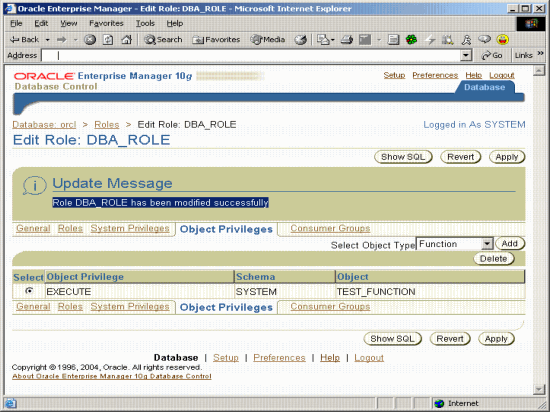
The Highlighted message above shows that Execute Privilege has been granted to DBA_ROLE.
Similarly you can click on Consumer Groups link in figure 14.9 to associate any role to the consumer group.
You can use Oracle Enterprise Manager to manage groups of users, or sessions, that are grouped together based on their processing needs. Resource Consumer groups can be managed using Database Resource Manager. Before you enable the Database Resource Manager, you must assign resource consumer groups to users/roles.
Following window will appear in front of you when you click on Consumer group link.

Figure 15Manage Role Consumer Group Window
Click on Modify button
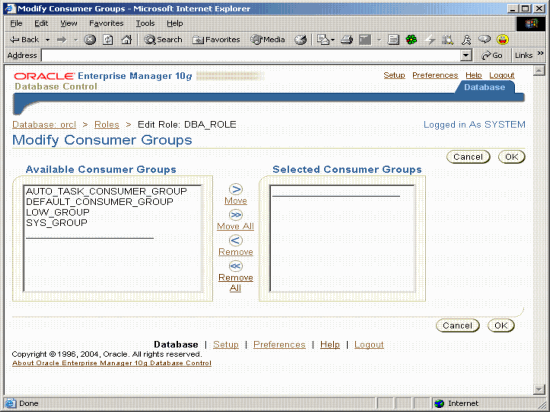
Figure 15.1Manage Role Consumer Group Window
Move the consumer groups to which you want to associate the role from available consumer groups to selected consumer groups.
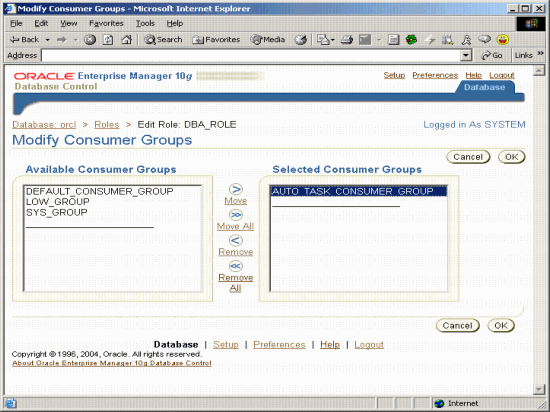
Figure 15.2Manage Role Consumer Group Select Window
Click on OK Button after selecting Consumer group.
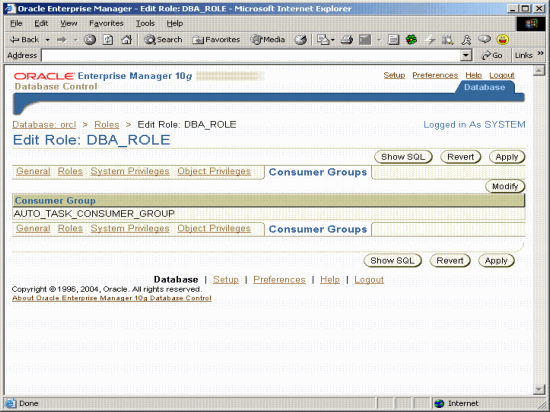
Figure 15.3Manage Role Consumer Group Selected Window
Click on Apply button to associate DBA_ROLE to the consumer group.
You can also click Show Sql button to actually see the sql query which EM will run to associate the user to the consumer group.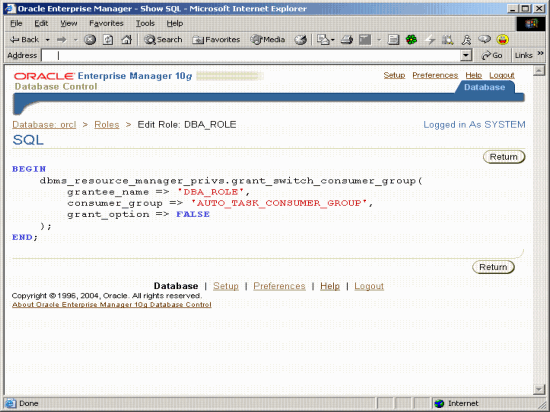
Figure 15.4Manage Role Consumer Group SQL Window
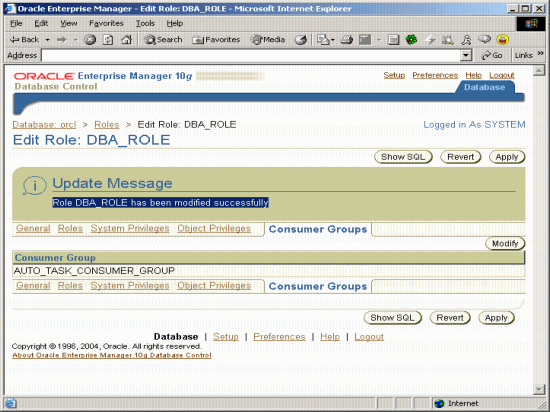
Figure 15.5Manage Role Consumer Group Window
The Highlighted message above shows that DBA_ROLE has been associated with AUTO_TASK_CONSUMER_GROUP.
Frequently Asked Questions
Why do we create roles?
How do I grant a privilege to role?
Can I grant a role to a role?
What is the significance of attaching a password to a role?
What is the significance of consumer group for role?
When will you get an error “Failed to commit: ORA-01934: circular role grant detected”?