
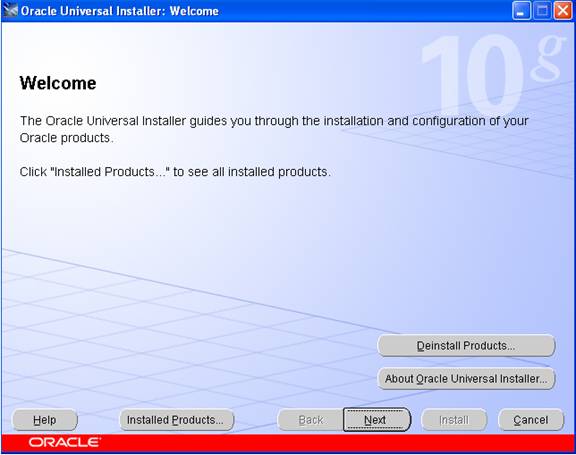
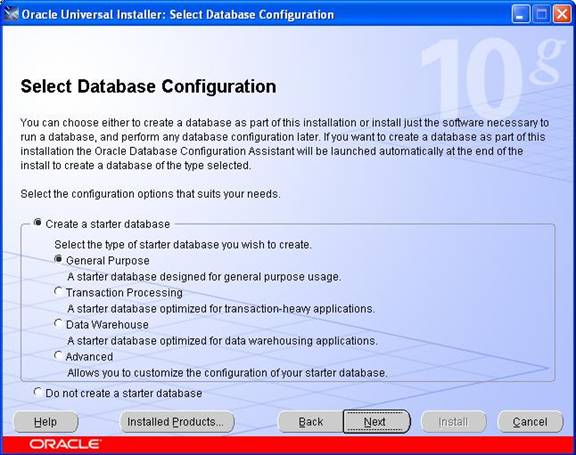
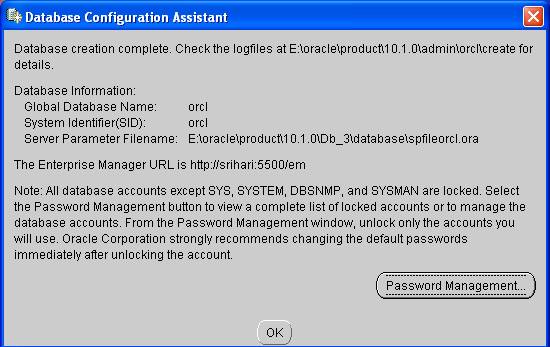
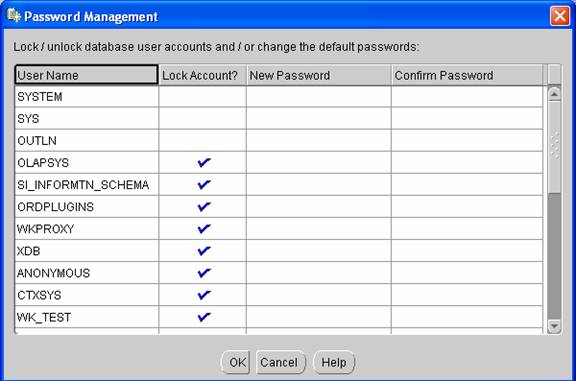
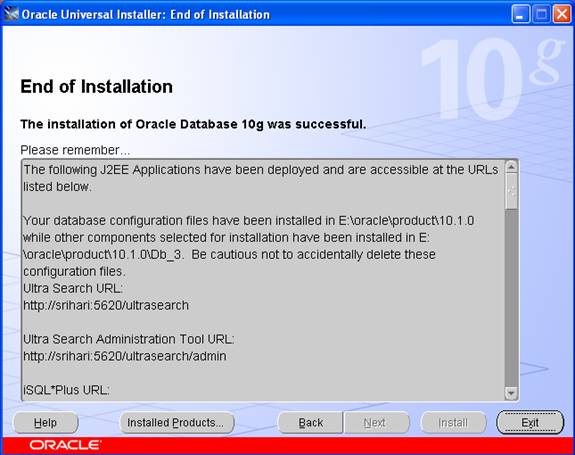
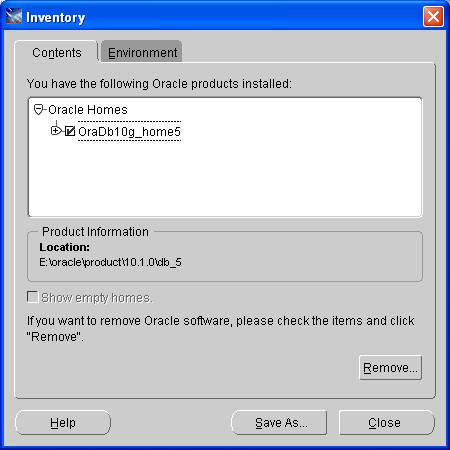
This document describes the step by step procedure of Oracle 10g Installation on Windows XP, testing the Database installation, making the test connection and frequently asked questions. Oracle software is fee for evaluation and educational purpose. If you don't have a copy, please start with the link below. You need to register for free account with www.oracle.com to be able to download. Start here to download the Oracle 10g Database for Windows . Click Here for download Oracle Database 10g Release 1 (10.1.0.2) for Microsoft Windows (32-bit). This Instalaltion procedure assumes that the Operating system is Windows XP. if you are using any other Operating System follw the links below. Standard is recommendations for naming files, mount points, directory structures, filenames, scripting techniques and folders when installing 10g and implementing an oracle database.. Anyone who knows the OFA can navigate an Oracle environment to quickly find the software and files used for the database and the instance. This standardization increases productivity and avoids errors. • Organizes large amounts of complicated software and data on disk to avoid device bottlenecks and poor performance A Pentium III or Pentium 4 based PC with at least 800 MHz processor, 256 MB of ram (512 is such better) and at least 10 Gigabytes of free disk space. After downloading the Oracle10g from Oracle TechNet, then you need to unzip the files and double click on the setup.exe program to get the installation process started. It is assumed that this is a fresh install so no other Oracle products should be installed at this time. In this screen, the Source and Destination locations must be selected. Click on the Next button to select installation type. This may take up to 2 minutes (depending on the speed of your machine). Once the product information has been read, the following 3 "Available Products" options are presented: After selecting the type click on the next button to get the screen: For this install, we chose the "General Purpose" Database option. Click on the Next button to continue. Keep the default names for GLOBAL and the SID Otherwise, use the following (make a note of these for later on): Global Database Name is orcl, Oracle SID is orcl In this step, you need to select where the Oracle data files will be located. In large operations, we typically keep the data files on a separate disk (or disks), however, for this install, keep the default storage Click on the Next button to move to the "Summary" screen: In this screen (shown above), the products and files that will be installed are summarized. Note that in this example, it will take 1.5 GB MB of disk space for the installation of the software. Additional space will be required for the default database. During the install, you will notice various Oracle products being copied over to the hard disk. Click on the next button .The Oracle Database Configuration Assistant will appear for some time while the default database is created and opened. As below Once the default database has been installed, the following screen will appear Click on the Password Management button and change the default passwords for the SYS, SYSTEM, SCOTT and DBSNMP accounts as shown below: Click the OK button to complete the installation. The following screen will be appears: After completion of installation .reboot your computer. Go to start menu - > programs - > orcle-oradb10g_home5 - >oracle installation products - > Click the universal installer, the screen will appears as below click the button installed product. to see the installed products. you will see the screen as below Click the button remove to remove the oracle products or you can remove directly on clicking deinstall product button in welcome page. Go to start menu - > programs - >oracle-oradb10g_home5 - >application development -> click on the sql plus. If the database is running and the username and password are typed correctly, SQL*Plus should log the SYSTEM user in and present the SQL> prompt as shown below Following step will describes the uninstallation of oracle 10g: First you have to remove all the oracle products by using oracle universal installer Go to start button -> programs -> oracle-oraDb10g_home1 -> oracle installation products -> click on the universal installer. You will get welcome screen, click on the deinstall products To remove the oracle products. After uninstall the products. Now you have to remove all the remaining oracle products manually run this command regedit.exe. You will get registry editor. 1. Where do I get the installable to install oracle 10g on my machine? 2. What should be the RAM of my machine in order to successfully run oracle 10g?Download Oracle 10g for Windows
Oracle Optimal Flexible Architecture (OFA)
Benefits by using Optimal Flexible Architecture
• Facilitates routine administrative tasks, such as software and data backup functions, which are often vulnerable to data corruption
• Alleviates switching among multiple Oracle databases
• Adequately manages and administers database growth
• Helps to eliminate fragmentation of free space in the data dictionary, isolates other fragmentation, and minimizes resource contentionSpecifications
If you only have 256 MB of RAM, make sure you have Windows manage at least 400 MB swap file (virtual memory). .
At least 6 GB of free disk space:
Space to download or copy source ZIP files: 1.5 GB
Space to unpack source ZIP files: 1.5 GB
Space to install Oracle10g Software: 2.0 GB
Space for Oracle data files (varies): 2.0 to 5.0 GB Installation

The Source path should reflect either your CD-ROM or the directory in which you unzipped the source files. Leave this as the default. In the example above, the source files were unzipped into c:\DOCUME~1HARI\LOCALS~1\temp\rar$ex12.1593\disk\stage\product.xml.
For the Destination, leave the Oracle Home named oraDb10g_home1 as the default. Choose a hard disk drive that has at least 6 gigabytes of free space. In the example here, we are using the E: drive.
Leave the \Oracle\product\10.1.0\db_1 path as it is (the default). If you must change this to a different drive, only change the drive letter and not the directories. 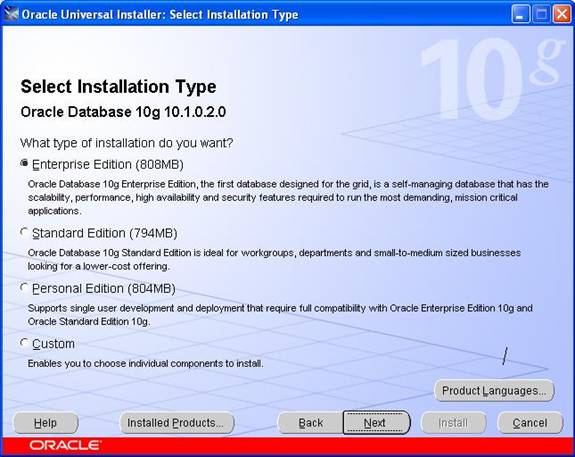
The next step is to identify the database using the Global database name 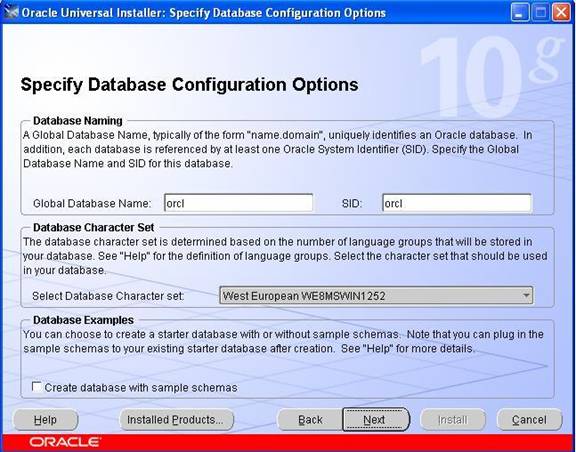
Click on the Next button to continue to the "database file storage option" screen 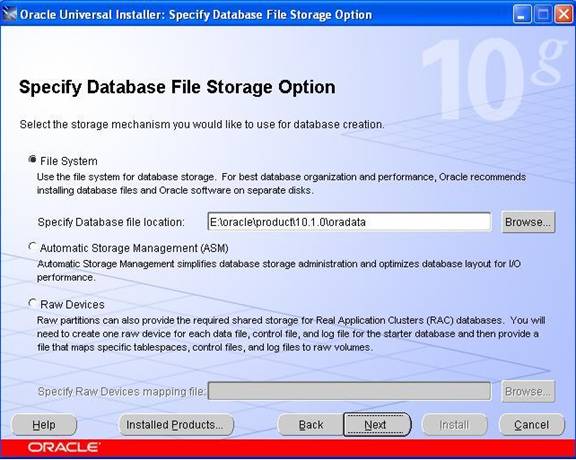
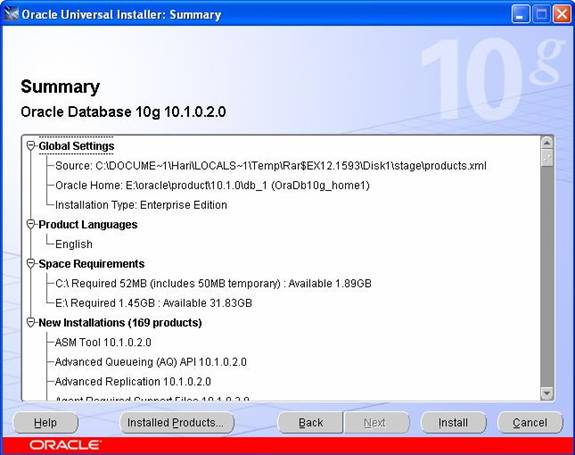
If everything looks OK at this point, click on the Install button to begin the installation. 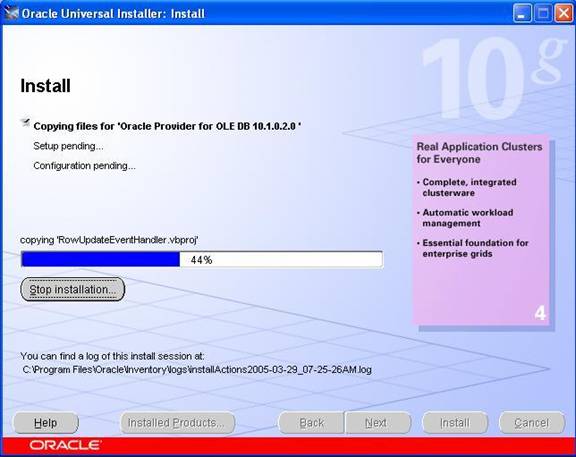
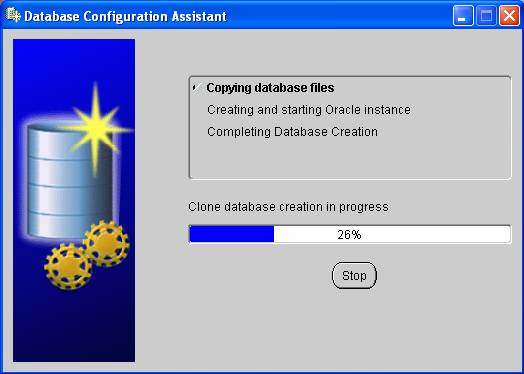
Once the installation is completed, the next step will be to configure the various additional services and the database.
The following tools will be automatically starts and it is optional. It is recommended, although not required 
To remove the Oracle products
Testing Installation
It will appears like the screen below, Once SQL Plus is running, you will be prompted for 3 things: Username, password and Host String.
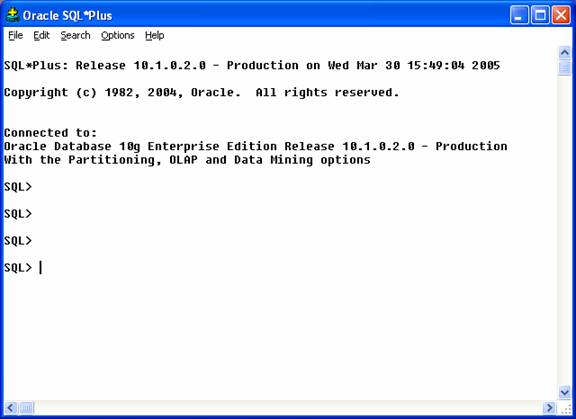
Fill in the Username and password fields with the SYSTEM account and leave the Host String field blank. Since we are connecting to a local Oracle database, no Host String is required. Click on the OK button as shown below: 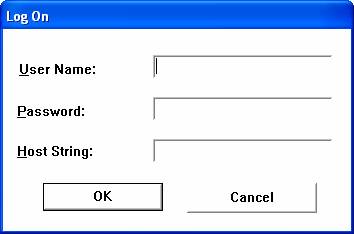
Uninstalling oracle 10g from Windows XP
Find related to oracle by using ctrl+f and remove all you find related to oracle, Do this again and again until you get no search. After completing this, reboot your system
Note: when you installing oracle 10g at first time on your system you may not encounter any problem. If any thing wrong you done when installation you may get an error like this staging area error
To overcome with that error you must delete every think related to oracle by using above uninstallation stepsFrequently Asked Questions
3. How much of disk space is required to install oracle 10g?
4. What does G stands for in Oracle 10g?
5. What are the new features of oracle10g?
Oracle 10g Free Training: Oracle Database Installation
Recent Tutorials
Categories
- Learning PL/SQL (13)
- Oracle 10g (34)
- Oracle PL/SQL (12)
- Oracle SQL (9)
- SQL and PL/SQL (2)
Subscribe to oracle tutorials
Blog Archive
-
▼
2008
(134)
-
▼
August
(34)
- Oracle 10g Tutorials : Oracle Net Services
- Oracle 10g Free Training - Synonyms
- Oracle 10g Training - Triggers And Triggering Events
- Oracle 10g Tutorials - Identifying PL/SQL Objects
- Oracle 10g Tutorials - SQL*Loader Discarded and Re...
- Oracle 10g Tutorials- SQL*Loader - Input Data and ...
- Oracle 10g - SQL*Loader
- Oracle 10g - Using Data Pump Export
- Oracle 10g Free Training - Using Data Pump Import
- Oracle 10g Free Training - Data Pump Components
- Oracle 10g Free Training - Manipulating data throu...
- Oracle 10g Free Training - Sequences
- Oracle 10g Tutorials- Updating Views
- Oracle 10g Tutorials - Creating Views, Altering, D...
- Oracle 10g Tutorials -Creating Index-Organized Tables
- Oracle 10g Tutorials: Altering Tables
- Oracle 10g Tutorials : Dropping Tables
- Oracle 10g Tutorials : Creating Tables
- Oracle 10g Tutorials: Tables
- Oracle 10g Tutorials: Overview of Schemas and Comm...
- Oracle 10g Free Training - Managing Roles and Priv...
- Oracle 10g Free Training - Creating Roles and Gran...
- Oracle Database Shutdown using SQL Plus and Enterp...
- Oracle Database Startup using SQL Plus and Enterpr...
- Oracle 10g Free Training : Starting and Stopping t...
- Oracle 10g Free Training : Starting and Stopping t...
- Oracle 10g Free Training - Managing Tablespaces
- Oracle 10g Free Training - Defining and Creating T...
- Oracle 10g Free Training- Administering and Managi...
- Oracle 10g Free Training:Creating Database Using D...
- Oracle 10g Free Training: Oracle Concepts and Data...
- Oracle 10g Free training- Database Introduction
- Oracle 10g Free Training: Oracle Database Installa...
- Oracle 10g DBA Free Training
-
▼
August
(34)
Visitors